Being my frugal self, I tend to store toys in cardboard boxes. They work great, but aren’t terribly attractive. Here are the results of a recent attempt to beautify the playroom. If you want to be super-thrifty, use a water-soluble glue so you can peel off, wash, and re-use the fabric once the box wears out. I can guarantee that I’ll at least consider doing that…
MATERIALS:
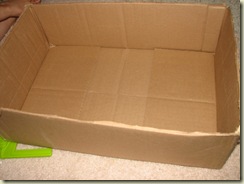
- Cardboard box
- Fabric
- Craft glue
- Duct tape (optional)
- Scissors to cut fabric
- sharp knife or exacto blade
Steps:
1) Cut flaps off of box.
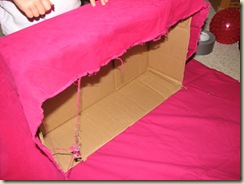
2) Figure out how much fabric you need to cover the outside and inside of box and cut two pieces – one for the outside and another for the inside. The fabric should overlap each edge 1-2 inches.
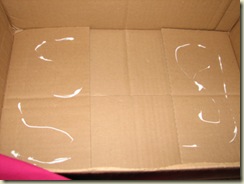
3) Put craft glue on bottom of box.
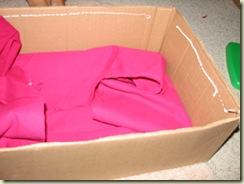
4) Center fabric on inside of box and press into glue. Add glue to top inside edges of box.
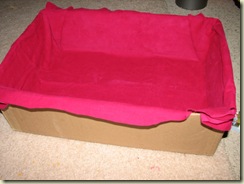
5) Attach fabric. You could trim the corners before this step, but then you risk fabric fraying. We left ours intact, which is why it bunches a bit in each corner. I think it looks good that way, but this might bother a perfectionist.
6) Secure liner fabric to the outside of the box either with craft glue or duct tape. We used duct tape (I love duct tape), but failed to get a picture thanks to “must remove duct tape from all surfaces” Johnny.
7) Center the piece of fabric for the outside of the box. If you want you can glue the fabric to the bottom; we skipped this step but it might help keep the fabric in place.
8) glue outside fabric to the inside of the box, tucking under the edges to prevent fraying. Glue the sides first, and then fold in the extra fabric on the ends before gluing the edges. Any extra fabric that you don’t catch this way can be tucked in after gluing.
9) Add toys. Or three-year-olds.
These boxes would be even easier to make if you skipped the craft glue and went straight to duct tape. I didn’t do this because 1) we only have the traditional silver duct tape and none of the pretty colored stuff and 2) for some reason Johnny has an irresistible urge to remove duct tape from surfaces. Maybe it’s the challenge of peeling it off?
MaryAnne is a craft loving educator, musician, photographer, and writer who lives in Silicon Valley with her husband Mike and their four children.



Great idea! You can never have enough storage!
We used banker boxes (they were around and they had lids) that we glued pictures from National Geographic all over. I did recently replace them with colorful cardboard boxes from Ikea though – they actually fit on Rebecca's shelves rather than hanging off. I'm trying to get everything off the floor.
@Beverly – thanks, that's another sewing blog I hadn't seen before and it looks like it has some great projects!
@Nadia – very nice ribbon box, thanks for linking me over!
gorgeous! i did this too.We used it as ribbon storage.. you can find it here at my blog:
http://funwithmama.blogspot.com/2009/08/unleash-your-creativity.html
it really is such a useful project and eliminates waste… it also looks gorgeous!! great storage solution.
loved seeing the way you did it!
here is another sewing blog http://www.dana-made-it.com/
It looks great! I love frugal organization tips like this! :-) Emma looks like she's having so much fun.
Cute idea!
What a transformation! :)
I did something similar with shoes boxes to store markers & pencils, paint, chalk, etc. I covered the boxes with construction paper and decorated and wrote on them. Some of the paper was patterned. Turned out well and looked creative. I did the same for the kids' prize box, which they helped me decorate.
Great idea! What is it with toddlers and duct tape – Anna is the same way.
That is a wonderful idea. I might have to try that. We have a ton of boxes and my mother-in-law has lots of fabric. I like the idea of adding a three year old too, we also have one of those!
very cute. love the color of the fabric